Most likely your project has a number of environments such as development, staging, and production, and you will need some version control in Sigma. This will require laying out a connection for each environment and including version tagging in your workbooks. Once this is all set up, you’ll be able to automatically move a dev version that’s ready to go into prod with just a simple change. This version management can be done in the Sigma UI or through our API. In this guide, we’ll go over some best practices of how to set up version management for both use cases.
Establish your connections
First, a quick introduction into Sigma connections. Connections are like gateways into your data warehouse. You can choose who can access the connection and what the connection has access to in your warehouse based on the user credentials you provide for the warehouse. You can also decide if each individual connection can write back to the warehouse. Each connection is its own separate gateway so you will not be able to join between different connections. You can follow the steps in our documentation here for how to create the connection to your warehouse: Connections – Sigma Computing.
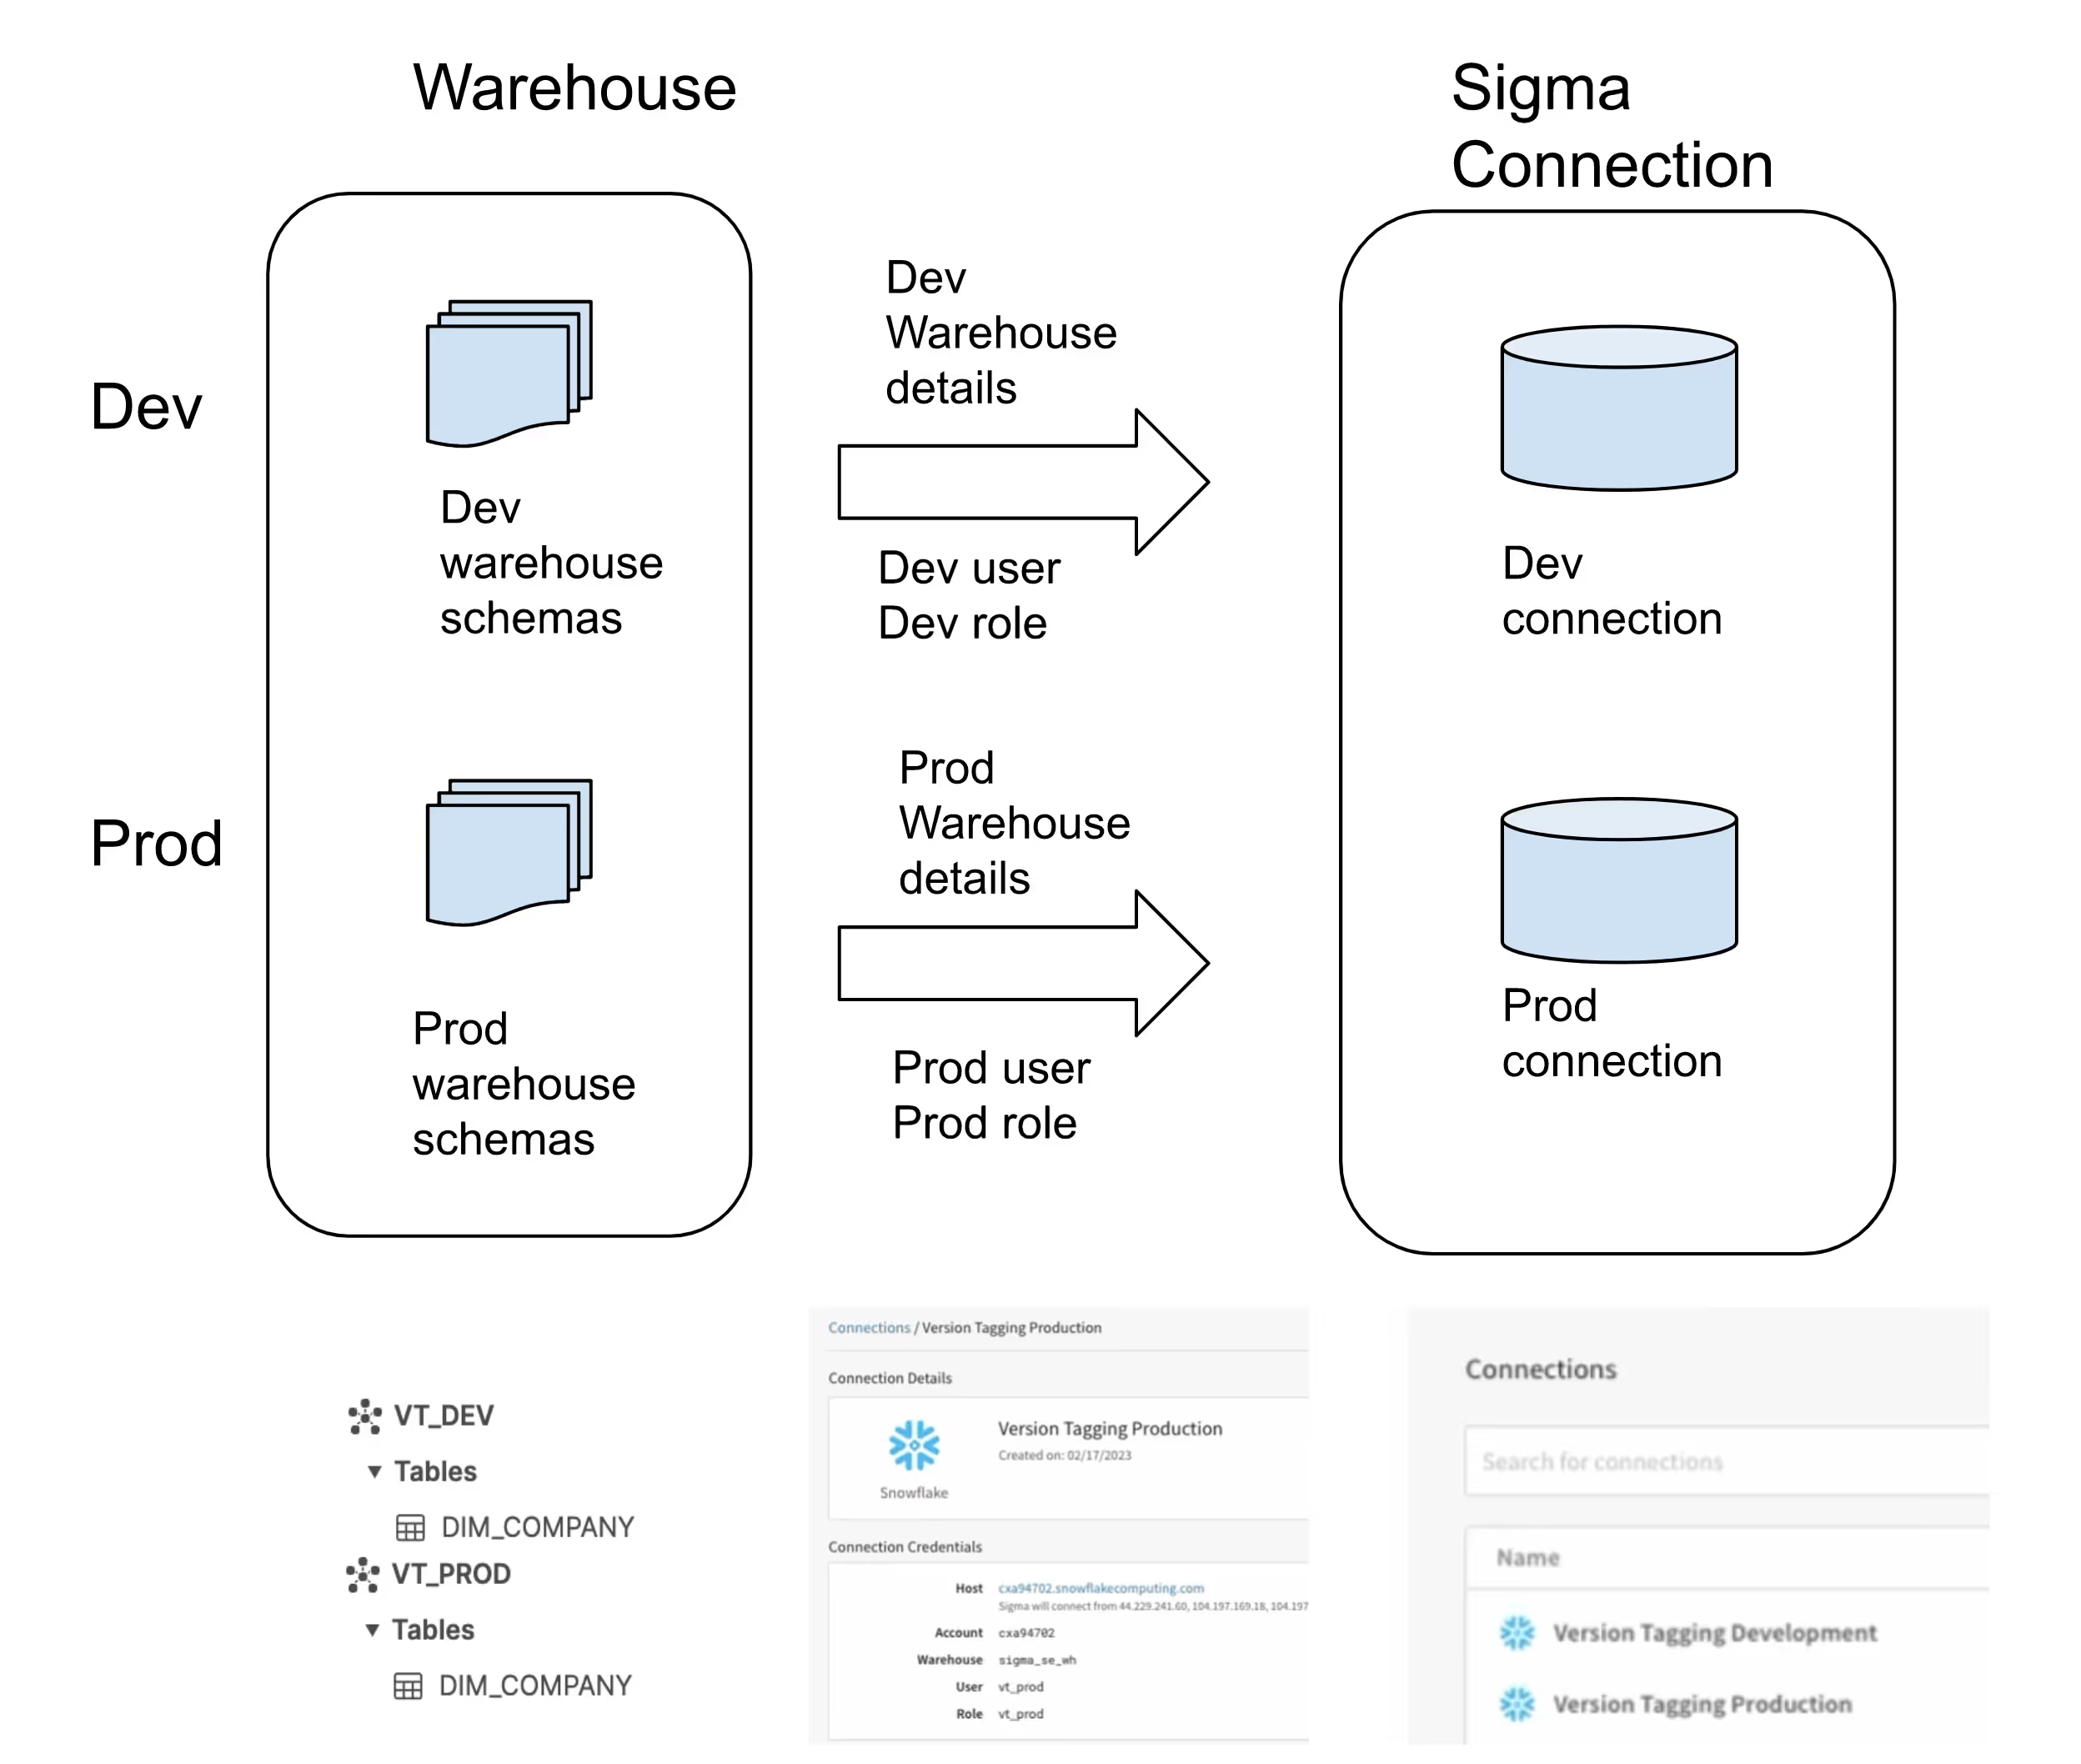
To have your multiple environments reflected in Sigma, you need to have or create a connection for each environment. If you have two environments, create a connection for each of these so you’ll have a dev connection and a production connection. For each of these connections you should have the corresponding user and role set, so they should be different for each connection. These users and roles should have access to different schemas in your warehouse. This could also be implemented by using different warehouse instances, but more commonly this is done by setting up different databases.
Create version tags in Sigma
Version tagging in the Sigma UI can be used for all Sigma workbooks, not just for embeds, but we will quickly go over it here. In the Administration page you can go to the Tags section and create tags for ‘Development’ and ‘Production’. For more steps on how to do this, check out our post here and our documentation here: Version Tagging (Beta) – Sigma Computing.

With the tags ready, you can go to your workbook with prod data and tag the published version as ‘Production’. Then tag the published version again but this time select ‘Development’ and make sure you select the option to swap sources. In the Modify sources module, select the dev connection so that your ‘Development’ version of this workbook will use dev data. Just to note, this swap option is not available for workbooks with more than one connection, or workbooks with input tables (write-back enabled).
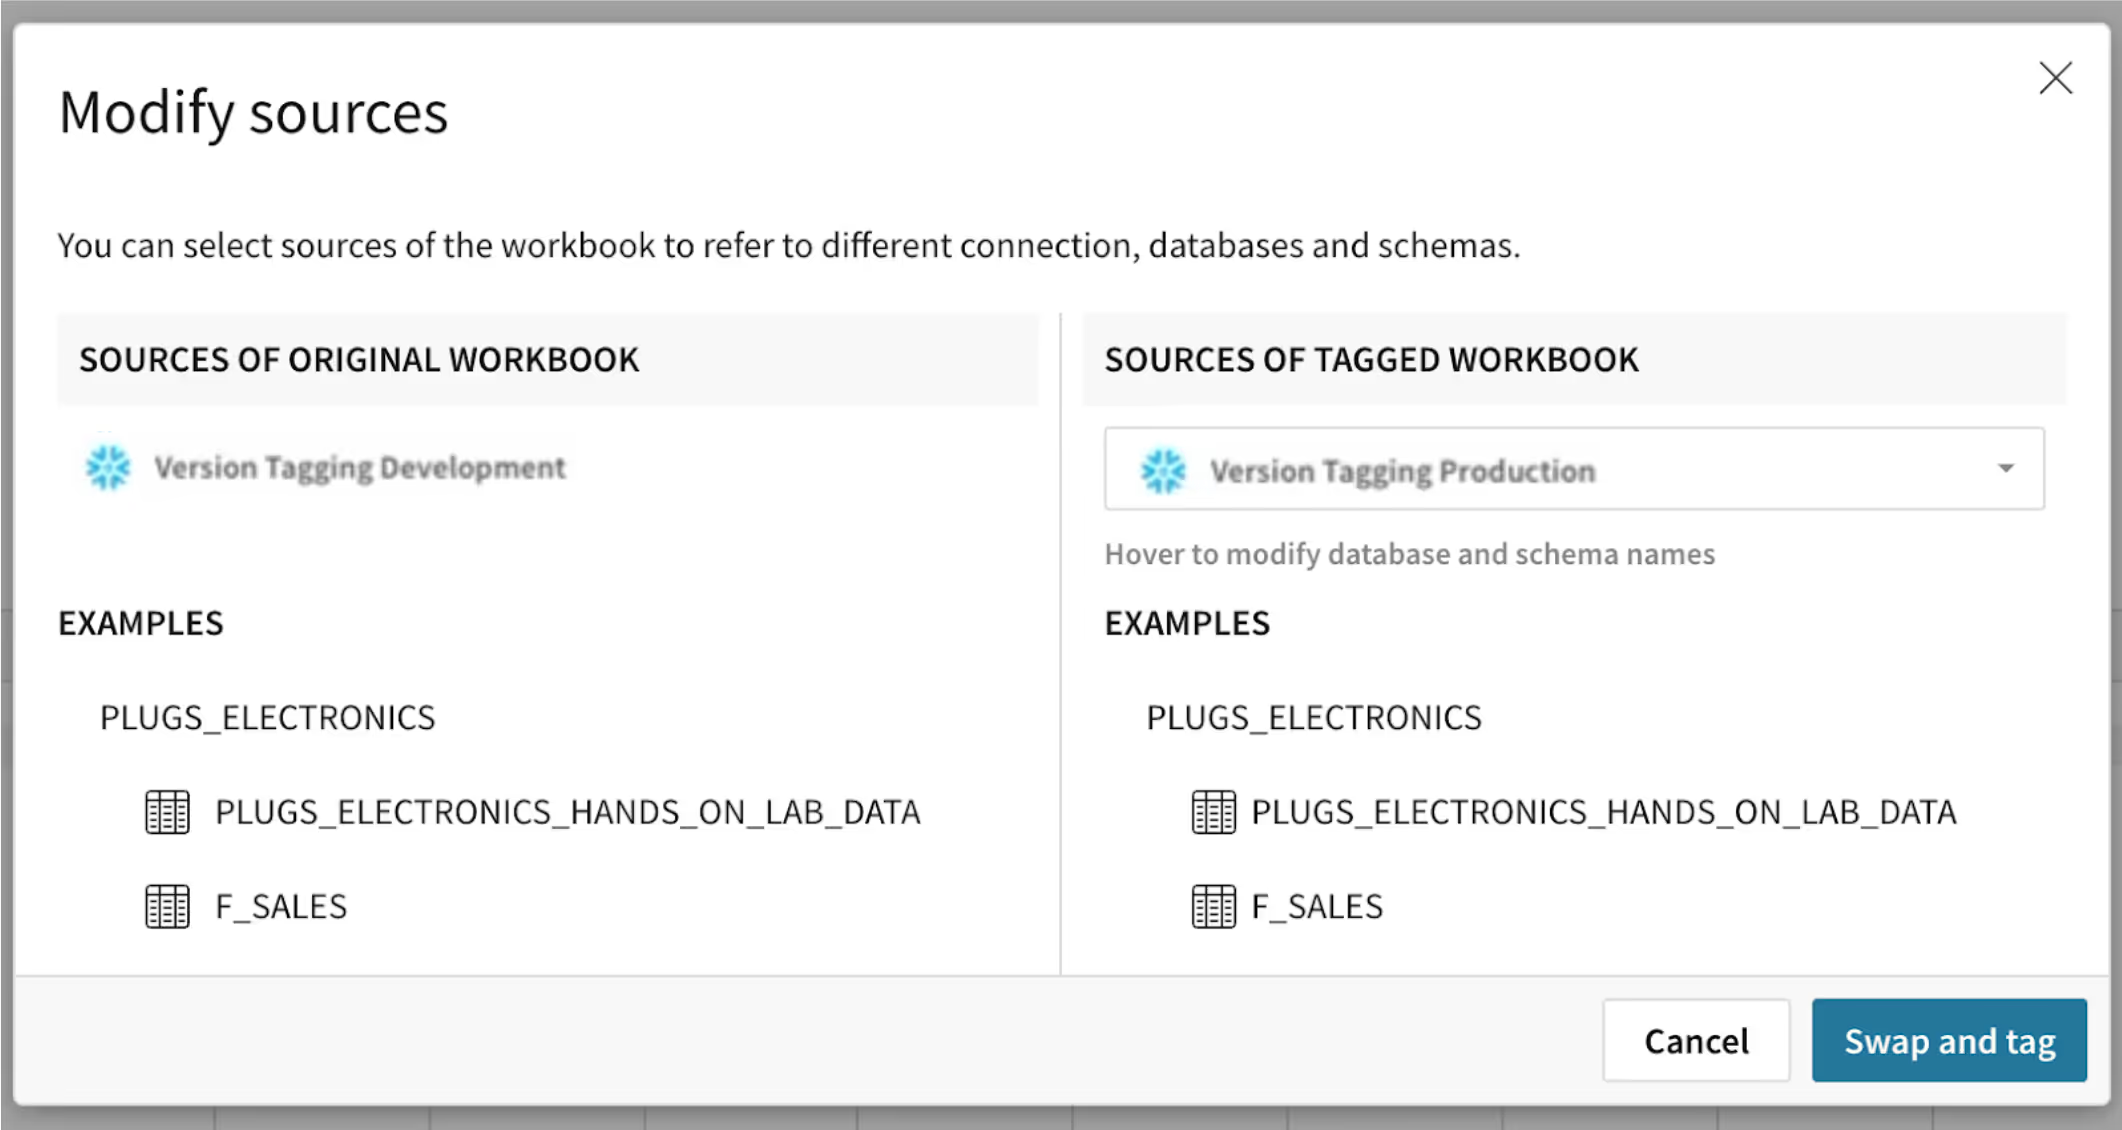
Let’s say you have been working on your dev version workbook and are ready now to move it to prod. You would first change the version tag over to the staging tag. As part of this process, Sigma recognizes this as you asking to switch connections. That means when anyone is accessing the staging tag, Sigma will automatically take them to the staging connection.
Version tagging in Embed URL
To specify the version tag you would like to use in an embed you can add ‘/tag/<tag>’ to your embed path. For example if your embed path was 'https://app.sigmacomputing.com/embed/7KnctsOB98suXFKLBIpiw7' then you could use ‘https://app.sigmacomputing.com/embed/7KnctsOB98suXFKLBIpiw7/tag/Development’ to display the dev version of the workbook in the embed. So even if in Sigma you are looking at production data, the embed will show the dev version as the tag is used to generate the embed. To show the prod version instead you would use ‘https://app.sigmacomputing.com/embed/7KnctsOB98suXFKLBIpiw7/tag/Production’.
Implementing version tag mapping
In your application project, you should have a git repository. Check in a folder to your git repo to hold Json files that will be used for version tagging. Each Json file should follow the structure below:
{
"workbookId": "3yT2nb08OWtHz53culAScV",
"workbookVersion": 2,
"tag": "Production",
"grantSourceAccess": true,
"sourceMappingConfig": [
"fromConnectionId": "a394dba4-b5c5-4ca-9e9d-9067f3b1ac41",
"toConnectionId": "1e8af3c1-322-4a2f-9b48-e710062ac78b",
"paths": [{ "fromPath": ["SE_INTERNAL_DB", "VT_DEV", "DIM_COMPANY"], "toPath": ["SE_INTERNAL_DB", "VT_PROD", "DIM_COMPANY"]}]
],
"sourceVersions": {}
}
This Json example is mapping from dev to prod.
<workbookId> This you can find from your workbook url, it’ll be the id after the workbook name. In the example here it is ‘3yT2nb08OWtHz53culAScV’.

<workbookVersion> This is the version number you would like to show in the embed. This is explained further in the next section. Here it is set to 2.
<tag> This is the tag for which version tag data is being used to populate the embed. For this example we’re using the ‘Production’ tag.
<grantSourceAccess> Set to true to allow access to the source.
<sourceMappingConfig>
<fromConnectionID> This can be found in the connection URL. For this example this is set to ‘a394dba4-b5c5-4ca-9e9d-9067f3b1ac41’ to use the development connection when someone is accessing the development tag version of this workbook.
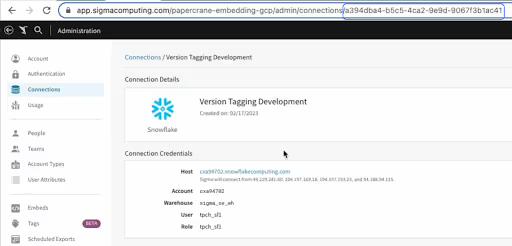
<toConnectionID> Basically it’s telling Sigma to switch to the prod connection when the ‘Production’ tag is called. For this example this is ‘1e8af3c1-322-4a2f-9b48-e710062ac78b’.
<paths> This is for switching the database, schema, and/or table. The structure of the paths should follow:
"fromPath": ["<db>", "<schema>", "<table>"]
For this example the database is ‘SE_INTERNAL_DB’, the schema is ‘VT_DEV’ for the fromPath and ‘VT_PROD’ for the toPath, the table is ‘DIM_COMANY’.
Workbook Version vs. Version Tag
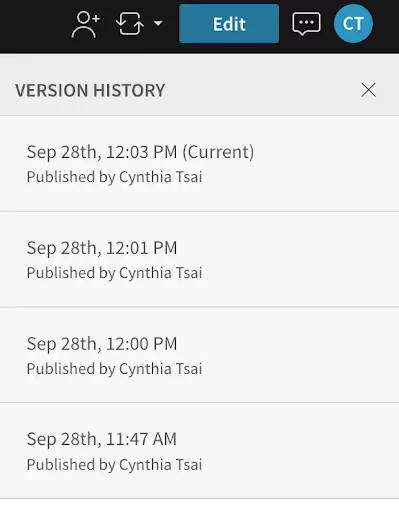
The workbook version and the version tag are independent of each other. In Sigma embeds you are able to specify which version number to show for the embed. For workbooks within the Sigma app, the published view will show the latest version. You can go into your version history within the app to see the different versions. Each time you publish your workbook, you are creating a new version of the workbook. In the example below, you can see that there are four versions. If the workbook Version is set to 3, the version published at 12:01pm will be the version shown.
The version tag, on the other hand, refers to the version of the data that is being used. This is where the different connections that were created at the beginning come into play. To put this into perspective, there can be an embed A tagged with ‘Production,’ with workbook Version 3, and another embed B tagged with ‘Development,’ with workbook Version 4. Embed A will show prod data with changes from the 3rd version of the workbook, whereas Embed B will show dev data with the latest changes.

Update version changes via API
As you create more versions of your workbook, you’ll need to make changes to your Json mappings to make sure that it is using the updated workbook Versions. You will need to make an API call to make the migration. This API call will also need to be made for any other tag/version changes made to your Json files. Below is an example of how the call should look:
#Example Version tagging API call
curl -X POST https://api.sigmacomputing.com/v2/workbooks/tag
--header 'Content-Type: application/json'
--header 'Authorization: Bearer <access_token>'
--data '{
<insert JSON data here>
}'
Documentation for the Version tagging API here.
Automate version changes via API
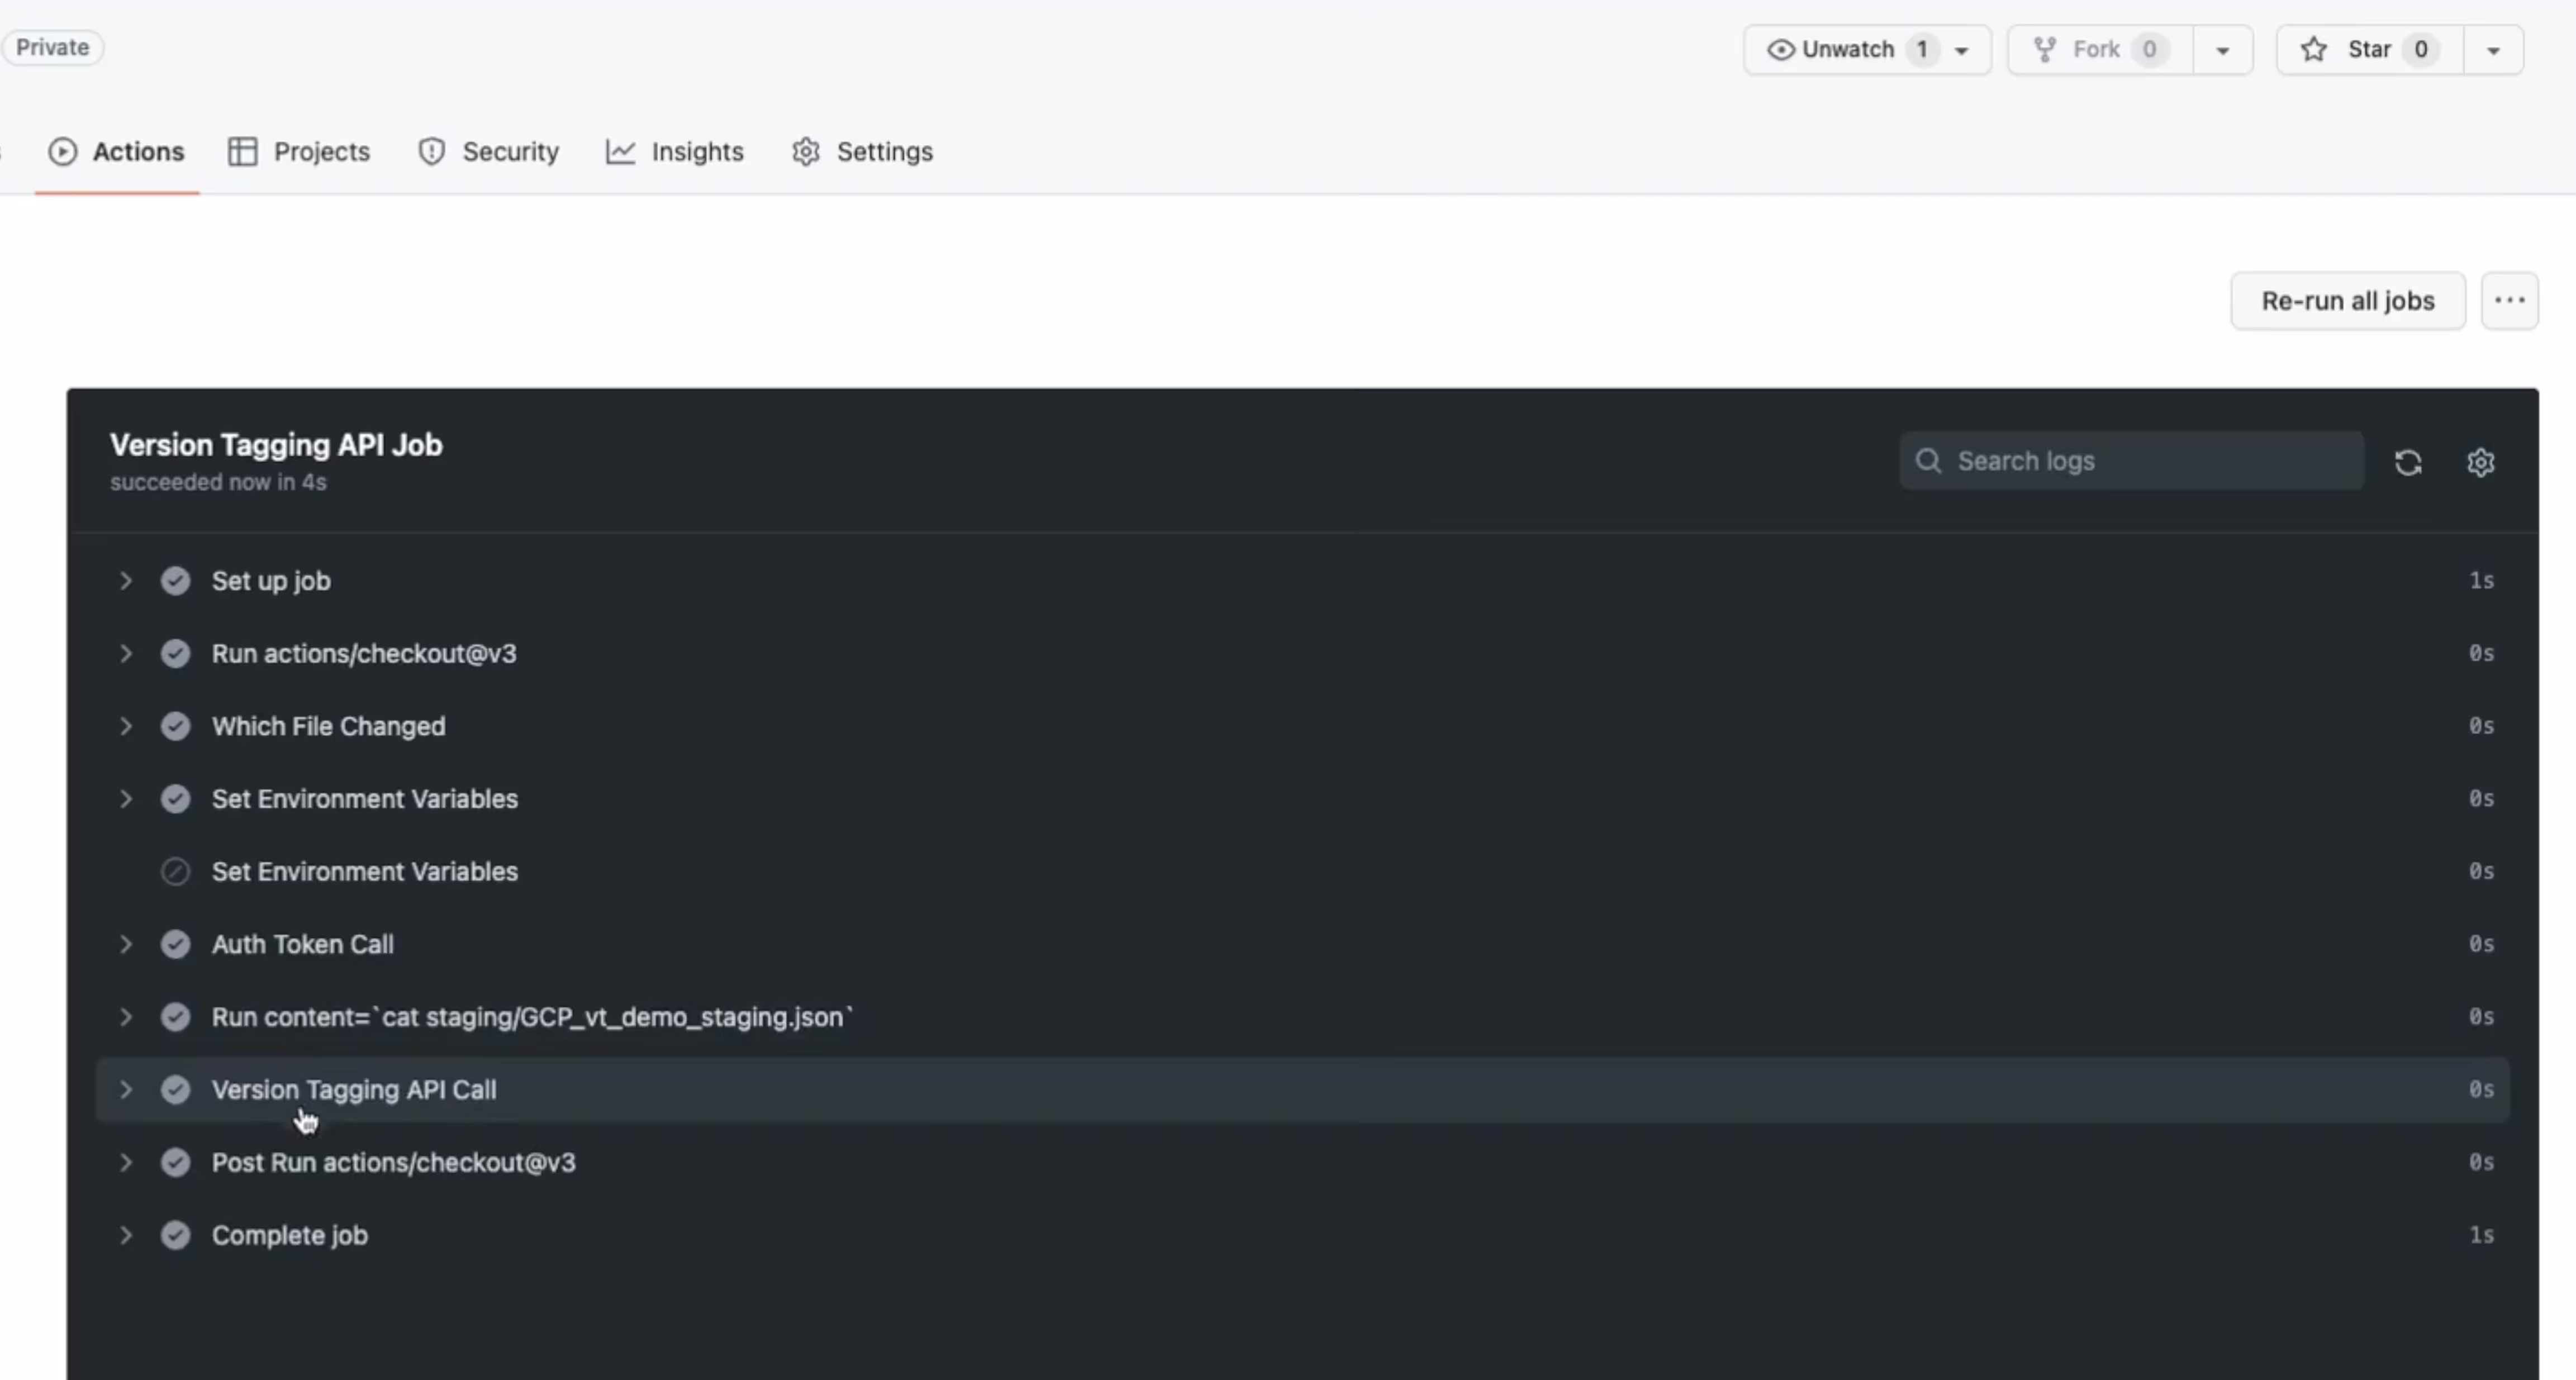
If you would like to automate the API call for when you make to your Json mappings, you can set up a CICD pipeline that triggers an API call when you make a commit to your git repository. The workflow should be set up as follows:
- Check git repo for which file has been changed.
- Set environment variables to make API calls.
- Make a call to get an Authentication token.
- Read contents of the changed Json file.
- Call Version tagging API (see example curl call from the last section), and use Json file contents as payload.
If you’d like additional information about Sigma, access the Resources page on our home page for Interactive Demos, the Sigma User Community, and Product FAQs.


